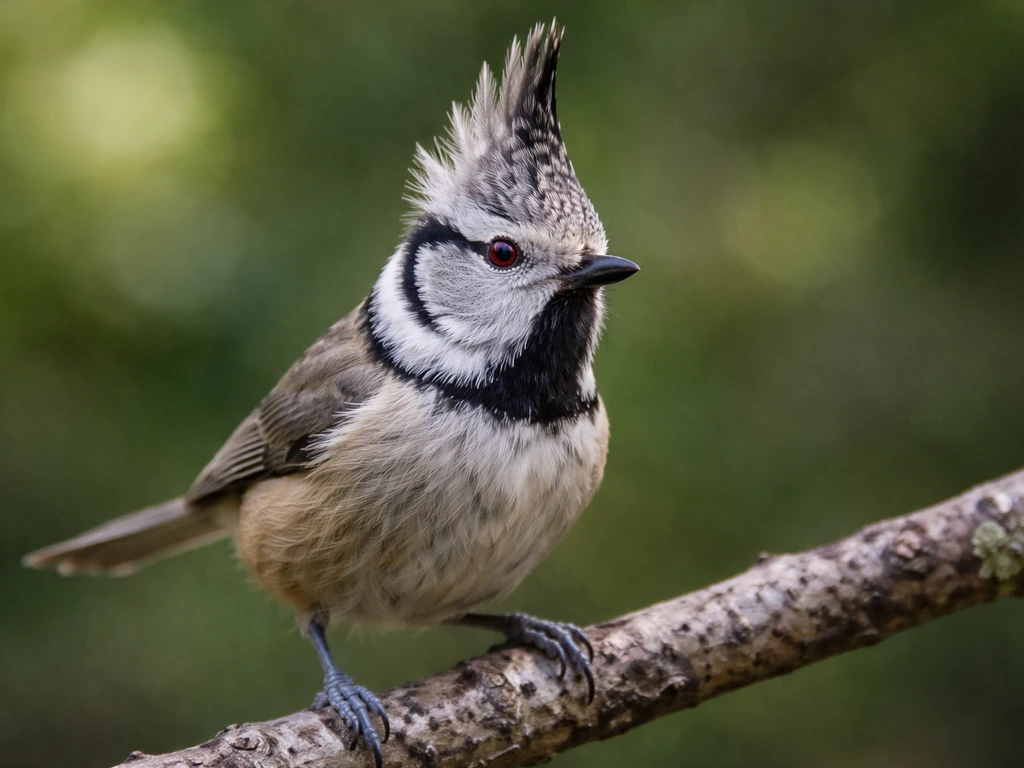
A top-view bird drawing means you're looking straight down at the bird from above, as if it's flying below you or perched on a glass floor. It's one of the most useful angles for showing wing shape, tail spread, and plumage pattern all at once, which is exactly why it shows up constantly in field guides, emblems, tattoos, and symbolic artwork. Getting it right comes down to nailing three things early: the oval body shape, the symmetrical wing placement, and the correct tail-to-body ratio. Once those are solid, the details fall into place.
Bird Drawing Top View: Proportions, Steps, and Fixes

Marcus Holloway
15 Jun 2026
What "bird drawing top view" actually means
When people search for a bird drawing top view, they almost always want one thing: a bird rendered from a direct overhead perspective, wings either spread or folded, body seen as a flat plane. It's not a side profile, not a three-quarter angle. It's the view you'd get looking straight down on a bird in mid-flight or perched below you. This angle is sometimes called a "dorsal view" in anatomy references because you're seeing the bird's back (dorsal surface), not its belly.
This view matters beyond basic art practice. In symbolism, emblems, and heraldry, birds are almost always shown from above with wings spread, because that angle projects power and dominance. Bird painting meaning often depends on the species shown and the symbolism of the pose, like a bird overhead suggesting power or dominance. If you're exploring bird drawing meaning or bird motif meaning in cultural contexts, the top view is the canonical pose.
If you're curious about the bird drawing meaning behind a top-view pose, the symbolism often comes from how the overhead angle communicates character and context. If you're looking at a specific symbol, you can also connect the top-view bird style to bird crest meaning in heraldic and cultural contexts bird drawing meaning or bird motif meaning. Dream interpretation traditions frequently describe birds overhead, and the dorsal view is the closest visual representation of that imagery.
In many dream books, that bird-shadow imagery is linked to bird shadow meaning, often tied to messages of freedom, change, or protection. So drawing this angle accurately serves both the artist and the symbol-hunter.
Getting the proportions right before you draw a single feather
Proportion is where most top-view drawings collapse. The body, wings, and tail each have specific size relationships that need to be roughly correct before you add any detail at all. Here's what to lock in first.
The body shape
From above, a bird's body reads as a pointed oval, wider toward the breast and narrowing toward the tail. Think of a rounded teardrop oriented vertically on the page, with the blunt end at the top (head) and the tapered end dropping into the tail. The body width is typically about one-third to one-half the total wingspan for most medium-sized birds. Resist the urge to make the body too wide, which is the most common beginner error.
Wing placement and span
Wings attach at the widest part of the body oval, roughly at the shoulder-chest junction. For a spread-wing pose, each wing extends symmetrically outward. The leading edge (front of the wing) curves gently forward, while the trailing edge has a softer, more complex curve shaped by the layered flight feathers. Ornithologically, those wing flight feathers are called remiges, and their arrangement is what gives the trailing edge its characteristic scalloped silhouette. For a folded-wing pose, the wings lie close to the body and you only see the outer edges of those feathers along the bird's sides, not the full spread.
Tail and feet
The tail (made up of flight feathers called rectrices) extends directly from the base of the body oval. For most songbirds, the tail is about one-quarter to one-third the length of the body. Raptors and waterbirds vary significantly, so this is where species reference matters. Feet in a top-view drawing are usually shown tucked tight against the body for a flying bird, or splayed to the sides for a perched-overhead view. Either way, feet are small relative to the body and should never dominate the composition.
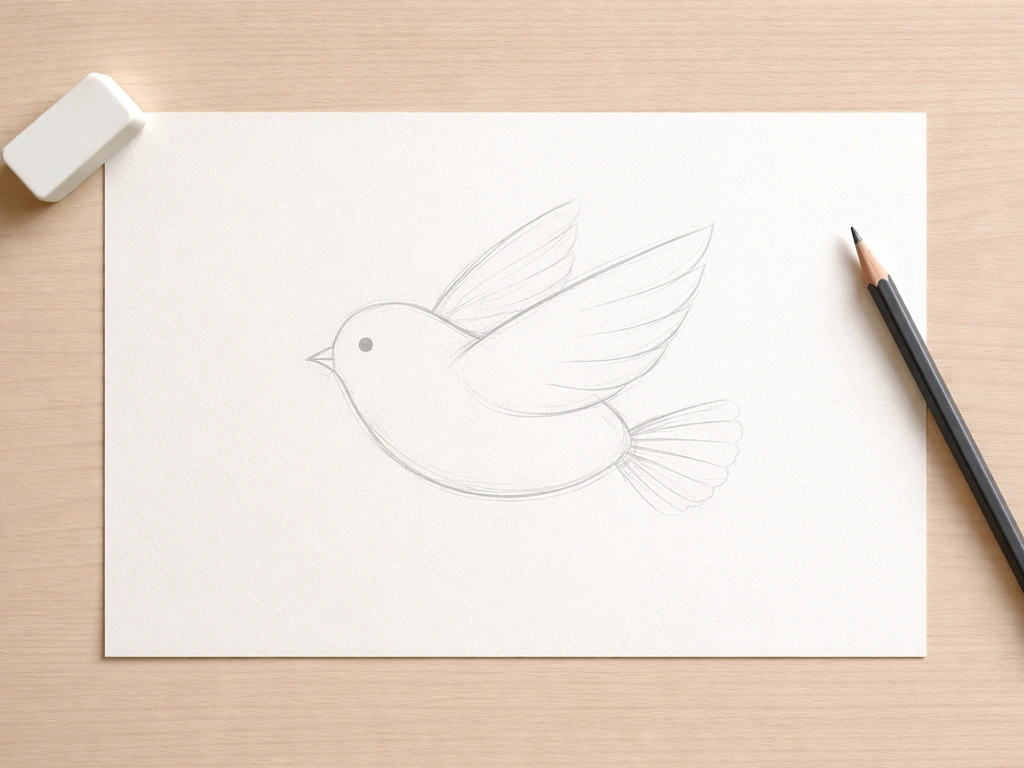
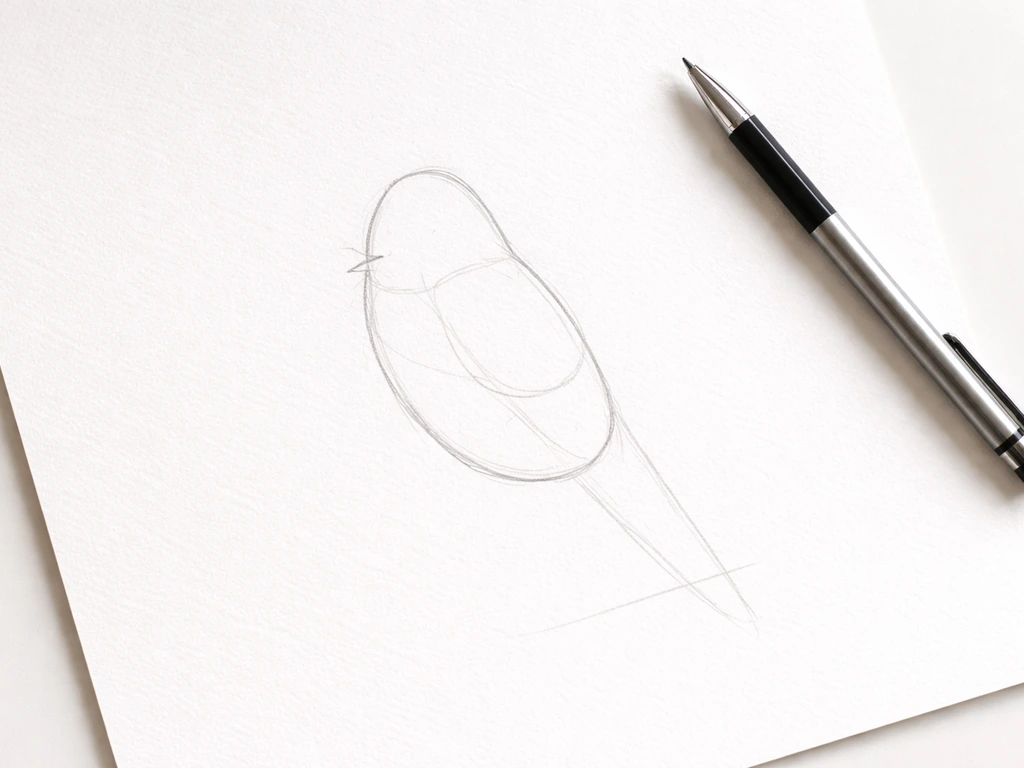
Step-by-step: drawing a top-view bird from scratch
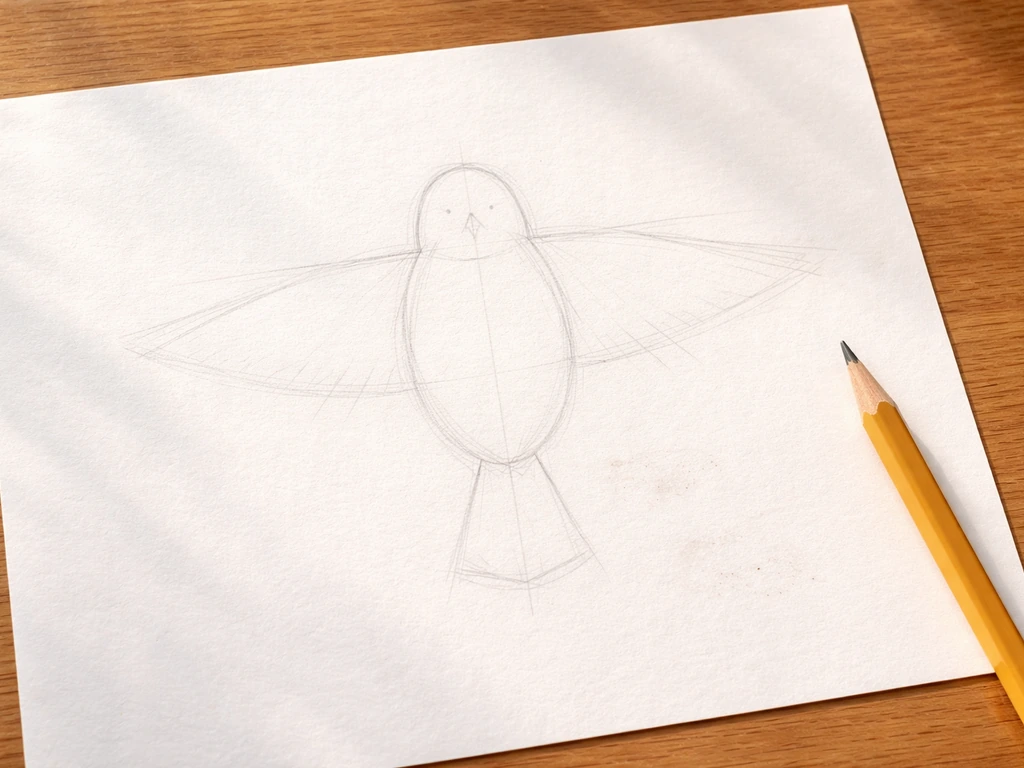
This guide works for a spread-wing flying bird, which is the most common top-view request. Use a pencil with light pressure for the first four steps so you can erase freely.
- Draw a vertical teardrop oval for the body. Make it about 2 to 3 inches tall on paper. The round end is the head end, the pointed end will merge into the tail.
- Add a small circle at the top of the oval for the head. It should overlap slightly with the oval, not sit separate from it. The head is typically about one-quarter to one-third the width of the body oval.
- Draw a horizontal centerline through the middle of the body oval. This is your symmetry axis. Every wing and tail element should mirror across this line.
- Sketch two curved lines extending outward from the shoulder area (just below the head circle) on each side. These are your basic wing shapes. Give each wing a gently curved leading edge and leave the trailing edge open for now.
- Fill in the trailing edge of each wing with a slightly scalloped curve to suggest the layered remiges. You don't need individual feathers yet, just the overall shape of the trailing edge.
- Add the tail below the body oval as a fan or wedge shape. The uppertail coverts (the feathers that cover the base of the tail) blend into the body, so don't make a hard break between body and tail.
- Add the beak at the top of the head circle as a small triangular or rounded-triangular protrusion pointing forward (upward on the page). From above, the beak is often narrower than people expect.
- Refine the whole outline, erasing construction lines, then begin adding feather detail, starting from the body center and working outward.
What you actually see from above: detailing wings, tail, beak, and plumage
Once your basic shape is solid, detailing becomes about knowing what is and isn't visible from the dorsal angle. This is where a lot of intermediate artists go wrong by including details that would only be visible from below or the side.
Wings from above
In a spread wing, you're looking at the dorsal (upper) surface of the remiges. These feathers layer from the body outward, with the outermost primary feathers (the longest ones at the wingtip) visible at the tips. The secondary feathers form the inner portion of the wing. Between the wing and the body, the upperwing coverts create a smoother, shorter-feathered zone. When drawing, suggest feather groupings rather than drawing every individual feather. A few lightly indicated lines separating primaries, secondaries, and coverts read as believably detailed without becoming fussy.
Tail from above
The rectrices fan out from the base of the tail. From above, you see the uppertail coverts first (short feathers covering the tail base), then the tail feathers spreading outward. Tail shapes vary dramatically by species: a robin has a squared tail, a swallow has a deeply forked tail, a hawk has a broad rounded fan. Choosing your species before committing to a tail shape saves a lot of reworking.
Head and beak from above
From directly overhead, you see the top of the head and the beak projecting forward. The eye positions are critical here: bird eyes sit on the sides of the skull, so from above you often see both eyes as two dots flanking the central head, not forward-facing like a human's. The beak should look narrow, since you're seeing the top ridge (culmen) rather than the full depth of the bill.
Plumage patterns from above
Top-view plumage is about dorsal coloration, which is often darker and more camouflage-oriented than the belly. A bird shadow meaning is often interpreted from this same overhead shape language, since posture and wing position affect what people read as symbolism top-view. Many birds have a darker back, wing bars that show as horizontal stripes across the wing, and distinct wingtip coloring. Raptors often show contrasting primary tips. Waterfowl have iridescent speculum patches on the secondary feathers visible from above. Adding even one or two of these species-specific pattern cues transforms a generic bird into something recognizable.
Mistakes that kill a top-view drawing (and how to fix them)
These are the errors I see consistently, whether in beginner sketches or rushed reference-free drawings.
| Mistake | Why it happens | Fix |
|---|---|---|
| Body too wide or circular | Copying a side-view body shape instead of the top-view oval | Use a teardrop shape, not a circle; check that body width is no more than half the wingspan |
| Wings attach too low on the body | Placing wings at the midpoint of the body rather than the shoulder | Wings should attach in the upper third of the body oval, just below the head |
| Tail looks like a continuation of the wing | Not establishing a clear separation between wing trailing edge and tail base | Draw the tail as a distinct fan shape below the body; add uppertail coverts as a transition zone |
| Beak too large or too wide | Drawing the beak from a front-view perspective | From above, show only the narrow top ridge; the beak should be much thinner than you'd expect |
| Eyes missing or placed forward-facing | Applying human eye logic to bird anatomy | Place two small dots on either side of the head, not on the front face |
| Wings not symmetrical | Freehand drawing without a centerline | Always draw and keep a vertical centerline; mirror each wing element across it |
| Feet too large or misplaced | Uncertainty about where feet tuck during flight | Flying bird: small, tucked feet near the lower body. Perched overhead: feet splay laterally from the lower body |
Using references well: photos, silhouettes, and species variation
No one should draw birds from pure imagination when references are this easy to find, and using them well is a skill in itself. Here's how to get the most out of your reference material without accidentally copying the wrong angle or the wrong species.
Finding true top-view photos
Search specifically for dorsal flight photos of the bird species you want. Aerial photography, drone footage, and field guide plates are your best bets. Be cautious with general "flying bird" photos, which are usually shot from below or at an angle. The U.S. Fish and Wildlife Service's Feather Atlas is an excellent free resource for examining individual feather structures, which helps you understand what you're rendering even if the images aren't full-bird top-view shots.
Using silhouettes as a proportion check
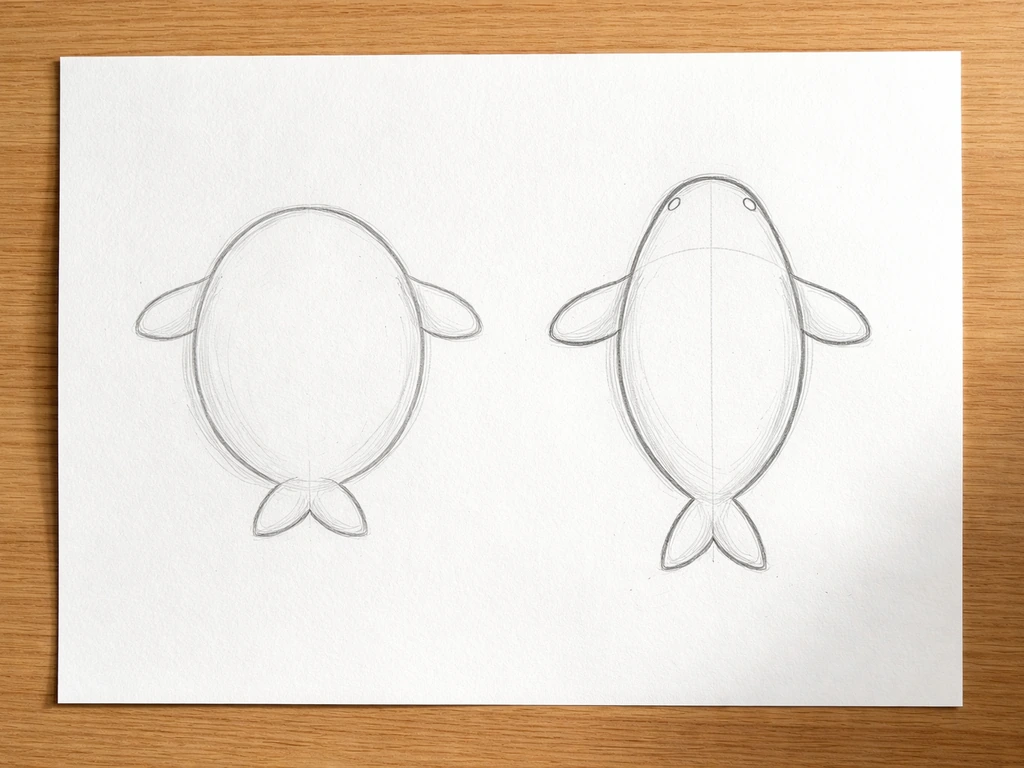
Bird silhouettes from above are some of the most useful drawing references available because they strip away color and detail and force you to focus on shape relationships. A bird silhouette from above will immediately show you whether a species has long or short wings relative to body size, whether the tail is forked or rounded, and how the head projects from the body. Silhouette references work especially well in the early construction stages before you add any detail at all.
Accounting for species variation
A generic "top-view bird" works fine for symbolic or decorative purposes, but if you want accuracy, species variation is everything. Wing aspect ratio (long and narrow vs. short and broad), tail shape, and head size all differ dramatically between a hummingbird, a crow, and an osprey. Before starting any detailed piece, identify the species or at minimum the family (songbird, raptor, waterfowl, shorebird), then pull a reference specific to that group. The basic construction steps stay the same; only the proportions shift.
Cross-checking your anatomy
Once your drawing is roughed in, compare it against your reference by checking three things: Does the body width look right relative to wingspan? Is the tail length proportional to the body? Is the head clearly distinct from the body oval? If all three pass, you're in good shape. If something feels off but you can't identify what, simplify back to a pure silhouette and compare outlines. That usually reveals the problem immediately, whether it's a wing that's too short, a tail that's too wide, or a head that got buried in the body shape.
The top-down view is also worth understanding beyond the drawing table. It's the angle embedded in countless cultural images, from eagle emblems to tattoo motifs to dream symbolism where a bird is seen passing overhead. A bird logo's meaning often draws on these same overhead, wings-spread symbolism cues bird logo meaning. Whether you're drawing for reference practice, symbolic artwork, or exploring what a particular bird image means across traditions, the skills here translate directly. Bird silhouette meaning often depends on whether the bird is shown overhead, in profile, or with wings spread. Accurate drawing and cultural literacy about birds reinforce each other more than most people expect.
FAQ
How do I keep symmetry in a bird drawing top view when my wings are “spread” but not identical in the reference?
Don’t force mirror-image wings. Lightly sketch a centerline through the body oval, then match the wingtip positions and attachment points first. Only after those anchors match should you refine each wing’s curve, allowing small asymmetries that look natural in aerial poses (one wing slightly higher or farther forward).
What’s the easiest way to draw the head and beak correctly from overhead without making it too human-looking?
Treat the head as a small oval or rounded wedge on top of the main body oval. Place the eyes as two dots flanking the center (because you’re seeing the sides), and make the beak narrow by drawing the top ridge rather than a full 3D bill depth. If the beak looks thick, reduce its width before adding any nostril or feather edge details.
My bird’s wings look too wide from the overhead view. How can I fix the wingspan-to-body ratio quickly?
Use a quick measurement pass: re-check whether the body width is roughly one-third to one-half of the wingspan for many medium birds. If it’s too wide, erase back to the body oval edges and rebuild the wings from the widest body section (shoulder-chest junction), not from the midpoint of the belly. This prevents the “chubby body” look that makes wings seem short.
How can I show feather detail in a top-view bird without over-drawing every individual feather?
Use feather group boundaries instead of hairs. Indicate a few separators for primaries, secondaries, and coverts with faint, short lines, and then leave most interior areas as clean value or pattern blocks. The top-view look comes from clear group shape and pattern placement (like wing bars or speculum), not from drawing each feather outline.
Should I draw the feet clearly in a top-view flying bird?
Usually keep feet small and tucked, or only suggest their outline under the body edge if they’re visible in your pose. Overemphasizing toes can ruin the overhead readability and make the bird feel “heavy” or cartoonish. If you’re unsure, prioritize tail and wing silhouette first, then add minimal feet marks last.
How do I choose the right tail shape for a top-view drawing if I don’t know the exact species yet?
Pick a tail category based on the silhouettes you can observe: squared, forked, rounded fan, or broad and tapered. Block the tail as a simple shape first (one to three main lobes or a single fan), then refine. Once you identify the species later, you can adjust the tail’s division points and angles without rebuilding everything.
What’s the most common mistake when translating plumage patterns to a dorsal (top) angle?
People often copy belly markings or assume wing patterns face the same way as side views. For top-view, focus on dorsal cues: darker back values, wing bars as horizontal stripes across the wing, and wingtip contrast. If you’re adding speculum-like iridescence, keep it limited to the correct secondary-feather area that’s visible from above.
How can I tell whether my angle is truly “top view” rather than a tilted three-quarter view?
Check the head-to-body and wing geometry consistency. In a true overhead view, both wing attachment points sit on the same horizontal level, the head reads mainly as a top surface, and the eyes appear as side-position dots rather than forward-facing. If one eye reads too close to the centerline, your perspective likely tilts toward a front-facing angle.
What should I do if I can’t find a perfect dorsal flight photo of my bird species?
Use a two-reference workflow. First, build shape from a dorsal silhouette reference (wing length, tail spread, head projection). Second, pull a separate reference for pattern cues (wing bars, primary tip contrast, waterfowl secondary patches) even if it’s not perfectly overhead, then keep those patterns constrained to the dorsal areas you can see in your silhouette.
When should I switch from construction lines to final linework in a top-view bird drawing?
Switch only after three silhouette checks pass: body width relative to wingspan, tail length relative to body, and a clear head separation from the body oval. Once the outline reads correctly, reduce pencil pressure for internal feather-group marks, then commit to final edges last (wings leading and trailing contours, tail outline, head outline).
Can I use the same steps for a tattoo or emblem style bird drawing top view?
Yes, but simplify the pattern grammar. For emblems, reduce feather groups to fewer shapes (often one or two wing bar bands and a clear wingtip highlight) so it still reads at small sizes. Keep the silhouette dominant, then add only the most recognizable dorsal cues for the species or motif.
Next Article
Bird Crest Meaning: What a Crest Signals and Why
Understand bird crest meaning: what raised head plumes signal in nature, plus cultural, spiritual and dream symbolism.